
 Grab a Special Deal!
Recommended products

SECURED PAYMENT

FREE SHIPPING ON ORDERS $39+
3-15 Days Delivery

MONEY-BACK GUARANTEE
Your satisfaction is our priority

 Grab a Special Deal!


3-15 Days Delivery

Your satisfaction is our priority
 Grab a Special Deal!

Exploring various ways of making adorable trinkets, like an acrylic keychain, will be an excellent way to get rid of your foul mood and retouch yourself from inside to outside. This post here is to give you a detailed step-by-step diy keychain tutorial on how to make a keychain.
Find answers to all your questions about acrylic keychains in this blog, including supplies for making keychains, tips for making keychains with Cricut, the way to make acrylic keychains, acrylic keychain ideas, and more. And now, let's enjoy the journey of being a professional crafter!
Before we get you into this fantastic adventure, let’s figure out what you need to prepare in advance!
1. Acrylic keychain blanks
2. Sublimation paper
3. Adhesive vinyl
4. Tassels
5. Awl
6. Pliers
7. A Cricut Cutting Machine
8. Heat Press Machine
9. Cutting mat
10. Vinyl Weeding tools
11. Heat-resistant tape
12. Transfer tape
How to make keychains with Cricut? How to make an easy keychain at home? How to make keychains to sell? How to make custom keychains? A DIY acrylic keychain with adhesive vinyl will be the easiest one! After making a great provision for your acrylic keychain design ideas, we can finally get started.
First, open up your Cricut Design Space (a picture editing program on your computer or phone). Search for your ideal images in the app or from other locations online. When you get access to your designs, you're already halfway!
Resize the images and set a shape to fit your keychain blanks. If you're using a round DIY acrylic keychain, make the images a circle. Or change it into a rectangle or square according to your blanks.
Then, extract the contours of your images and do not mirror them. Connect your Cricut cutting machine to your computer and get ready to receive the cutting code from the editing program.
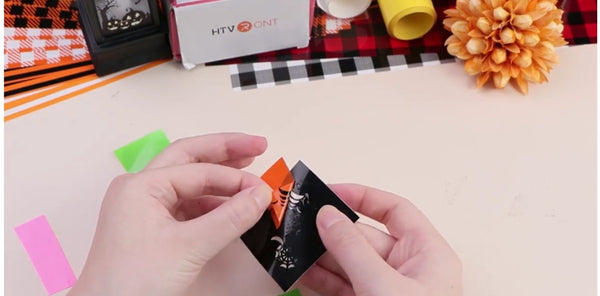
Meanwhile, place your chosen adhesive vinyl on the cutting mat and then send it to the cutting machine. You must note to align the position of your vinyl the same as the program, or the images may be cut in the wrong place and not even on your vinyl.
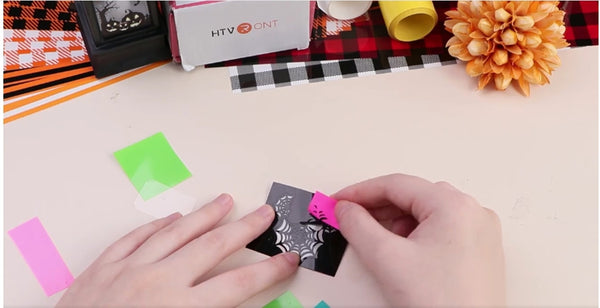
When the cutting process is complete, weed away the extra vinyl scraps. Then, cut out a piece of transfer tape with the proper size and apply it to your adhesive vinyl designs.
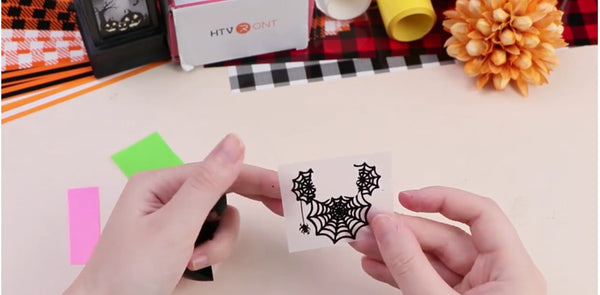
Use a scraper to remove the bubbles between the vinyl and transfer tape, and transfer the designs to your custom acrylic keychains. Add some beautiful tassels to the keychains. Then your pretty gifts are ready!
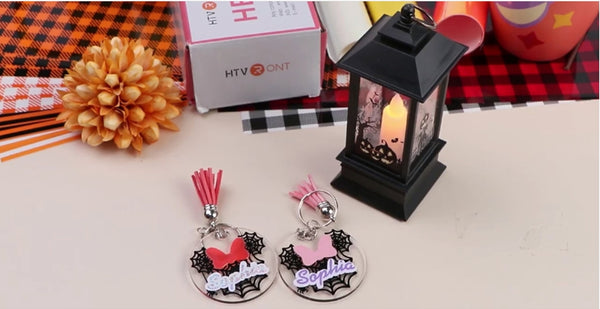
What are you waiting for? Just give it a sophisticated wrap and surprise your family members, friends, and beloved ones!
Following the lead to make a step-by-step DIY keychain with adhesive vinyl is relatively easy, right? However, sometimes you may feel like the simple colors and patterns of permanent vinyl demonstrate a mundane effect. So, there's another choice you can make to combine much more vivid colors: A sublimation paper!
Sublimation paper is a printable material that can be sublimated with high heat. With its superior printable characteristics, you will find out the high-tech method of making acrylic keychains with pictures here.
Still, you need to use the Cricut Design Space to choose your favorite images or drag a photo from your album into the program. Edit the shape and size of your images to fit the keychains.
Use an inkjet printer to print out your images on sublimation paper.
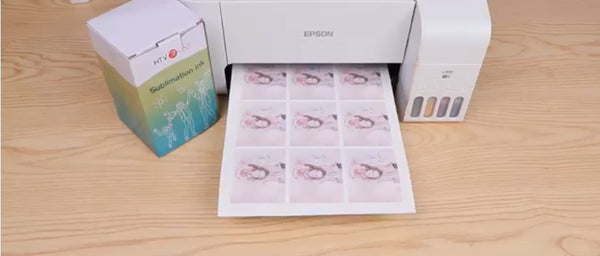
Note that you must apply sublimation ink to complete the printing process, or your results may fade quickly during the first several washes.
Here, you can set the precise shape of your personalized acrylic keychain and take advantage of the "print-then-cut" function of your Cricut machines to finish the further cutting process. Or, you can just print out the design and manually cut the shape with scissors.
If you're using the "print-then-cut" function, you need to load your printed paper into the cutting machine and send the cutting code after printing. Magic happens along the way! You can see that the cutter cuts the contours very accurately.

Preheat your heat press now to 400F, and then place your processed sublimation paper on the acrylic keychain. Fix the paper's position with your heat-resistant tape, heat press the keychain for 40 to 60 seconds, and your photos can be transferred perfectly to the keychain.
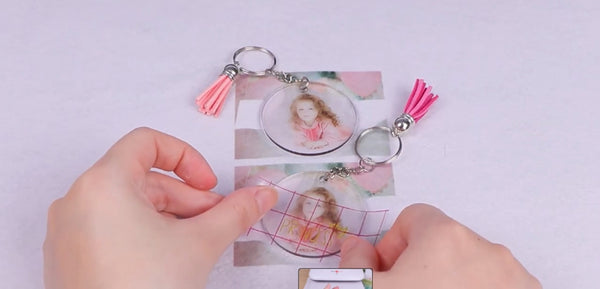
This DIY photo keychain can even display a transparent visual effect, and the design can hold on for a long time. By adding some adhesive vinyl designs, you can also dot the trinket with your personal touch.
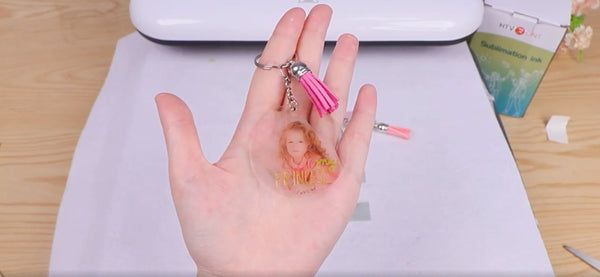
Imagine how thrilled your friends and kids will be when they receive their custom DIY photo keychain! Seeing their selfies on the keychains must be an exciting thing!
The answer is yes! UV resin is a material that can cure to be a hard object. You can pour it into an abundance of molds with shapes and patterns and cure the resin with UV light. It’s a way of making keychain blanks. And you can even beautify the resin by mixing up resin pigments and sequins so that your final blanks can be fascinating and shiny! Also, you can apply the resin to seal the vinyl designs to extend their lifespan!
Yes. Typically, sublimation requires high-heat techniques, which means the substrate must be heat-resistant. The acrylic keychains can always address the material challenge. Therefore, you can feel assured of applying sublimate to the keychains.
There are two ways of making a picture on the keychains: sublimation and printable vinyl. Both methods can help you print out vivid and bright pictures and transfer them to the keychains. You only need to print out the photos with a printer and cut the material into a proper shape to fit your keychains. Use a heat press to transfer the sublimation images. Or you can just peel off the printable vinyl, a type of sticker, and stick it on the keychains.
![[Ultimate Premium Bundle] Auto Heat Press Machine 15" x 15" 110V + 20 rolls HTV Bundle 12“x3ft + Mini Heat Press Machine + Sublimation & Tools Bundle](http://www.htvront.com/cdn/shop/files/205_2_385x.jpg?v=1733987310)




Reselect your machine
Reselect your machine
Reselect your machine
Reselect your machine
Reselect your machine

To improve our service quality, we value your shopping experience at HTVRONT official website and your willingness to recommend us to others. Please take a few moments to complete this survey.Your opinions are important to us. Thank you for your participation and support!
Website interaction (e.g., shopping page, promotion, order, payment process)
Product (e.g., product quality, style)
Logistics (e.g., shipping, delivery)
Customer Service (e.g., response speed, professionalism)
[Website - Shopping Page]
[Website - Promotion]
[Website - Order and Payment Process]
[Product]
[Logistics]
[Customer Service]