If you've noticed around these days, trends come and go faster than the speed of light. One minute, low-rise jeans are the coolest and freshest vibe. Next, they’re too old and outdated.
So what’s hot now?
Is it golden teeth grills, or durag, or biker shorts? Nobody knows!
You catch my drift?
It feels like everything is changing so fast. Luckily, some things have learnt to adapt and evolve over time. And our dear old tote bag is one of them. Ask your grandma, she probably owned one or two.
And we understand why.
Tote bags are timeless. Originally, around 1940, their main purpose was carrying heavy loads to the house.
And these are the perks that made people love it so much; they’re multi-purpose, durable, sustainable, stylish, customizable and lastly, they are very, very, very simple to make.
All you need is a little time, little energy, simple instructions, and cheaply available materials.
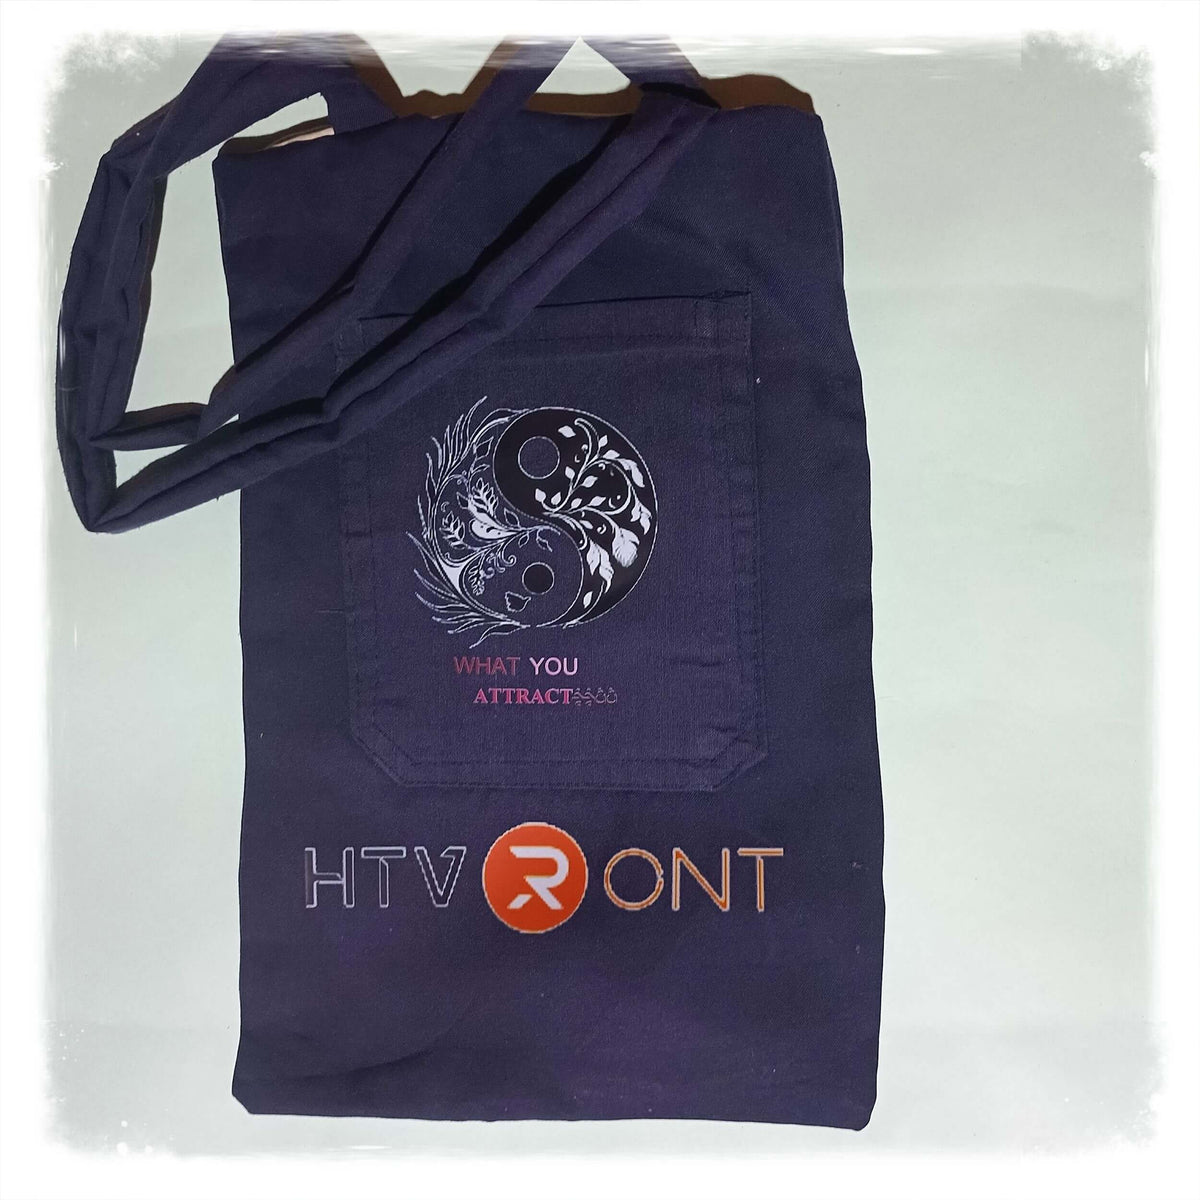
Here’s a step-by-step guide to making a do-it-yourself tote bag from an old coat, complete with inner lining, straps, and a heat-pressed design.
Step 1: Assemble Materials Needed
Like a prepared crafter, you don't want to be interrupted while you’re in the zone. I mean, that's how someone ends up with a half-painted room, because they forgot to buy enough paint. We’ll need:
Old coat (preferably thick fabric like wool, denim, or leather)
Lining fabric (cotton or polyester) -an old pillow case will do the trick
Fabric scissors
Needle/ Mini handheld sewing machine
Strong thread (preferably same colour as your coat and lining)
Pins or fabric clips - to hold our fabric in place when cutting and sewing
Measuring tape
Fabric chalk or marker - to mark accurate measurements on your fabric
Heat transfer vinyl (HTV), paired with a crafty design for decorative purposes
Now that we have all our materials, this is where we turn our old coat and boring pillowcase into neat fabric pieces.
Main Tote Bag Body
Lay the old coat flat on the table. Fold it in half, with the right sides facing in. This makes it easier to go to the next step without taking your cut pieces apart and re-pinning them together again.
Measure two rectangles with the same dimensions (16” wide and 18” long). To be a little creative, I decided to use the part with the pockets - this adds to the final design without having to add the pockets myself.
Mark down with your chalk/marker, the measurements on your fabric.
Then pin your two fabric pieces together, this will allow you to cut out your two uniform rectangles. They will be the front and back of your awesome tote bag.
The next step is measuring and cutting two long strips (2” wide × 24” long) off the coat’s sleeves. They’ll be your bag’s handles.
The Lining Fabric
It's time to cut another matching piece, but this time, the rectangles come from the old pillow case. And this might be the most important part of the bag.
With the right sides facing in, start by measuring (16”wide x 18”long) and mark it down with your chalk.
Pin your fabric in place, and cut it.
The Inner Pocket (optional)
And why not increase practicality by adding inner pockets? This is the safest place for your loose change, keys and even your phone. Isn't it lovely?
Measure and cut a small rectangle (5” wide x 7” long) from your pillow case.
Fold the fabric you just cut, a ½ inch on all the sides. You can iron the folded parts to make it easier.
Then hand stitch the top part, as close to the edge as possible. This will be your opening.
Remove some pins from your lining to allow easy access to the right side. This is where you'll be placing your pocket.
Choose a place for your pocket, and pin it onto one lining piece.
Having the pocket in place, now we sow sow sow…..
Stitch the three remaining sides of your soon-to-be pocket, onto the lining as close to the edge as you can. Leaving as much room inside for your pretty little things.
Tie a knot on any hanging thread and cut off its excess for a more neat finish.
Return the pins to their original place on the lining, with your inner pocket secure in place.
Step 3 : Hand-Stitching the Fabric Pieces Together
We're all done with the boring stuff - cutting, measuring and marking of our fabric. Now the fun part begins - stitching.
Outer Tote Bag
Hand stitch your outer tote bag fabric (make sure the right sides are facing in).
For better strength and durability, groceries can be heavy, use backstitch method to sow. Remember to leave the top part open, don't go crazy stitching. I know. It's exciting stuff!
Tie a knot on any hanging thread and cut off the excess.
You can now turn your bag inside out, so the seams can be hidden.
Inner Lining
Having your right sides facing in, and your fabric pieces pinned together in place.
Stitch on the sides and the bottom. But leave a 3-inch opening at one of your bottom corners, for turning later.
Don't turn it inside out just yet.
Handles/Straps
You're going to fold your straps in half, lengthwise, an iron will come in handy right about now.
Hand-stitch the open side. Tie a knot on any hanging threads and cut off the excess.
Finally turn your straps inside out, to hide your seams.
All you have to do now is throw away your stra…....just kidding. Now you attach your straps to your outer tote bag (right side).
Measure 3 inches from the sides of your outer tote bag and mark them.
Pin your straps in place, on the markings.
Stitch your straps to the outer tote bag, with a temporary stitch(basting stitch).
Assembling the Tote Bag
It might look like assembling is the simplest or the most basic part. But no, it's actually the most complex of all the steps. Buckle up crafters!
Start by inserting your outer tote bag inside the lining. The right sides to face each other. The bag straps should be in-between the lining and the outer tote bag.
Now align the top edges of your fabric and pin it in place.
Measure and mark an inch from the top edge. After stitching, your straps will be locked inside the seams.
Tie any hanging thread and cut the excess.
You can now pull your outer tote bag through the 3-inch opening at the bottom of your inner lining.
All that's left is to close your open-gap with a backstitch and push your lining inside.
Step 4: Decorating your Tote Bag
What kind of crafters would we be without a little razzle dazzle?
You better go wild on your design - make it memorable!
Creating your Design
You can either use Heat Transfer Vinyl (HTV) or printable heat transfer paper for your design. But in this case, we'll be using HTV.
Using a design software like Canva and Photoshop, you can now come up with your beautiful illustration.
Adjust your illustration size to fit the tote bag.
Using Canva, flip your illustration horizontally or mirror it before cutting.
Place your HTV on the cutting machine, shiny side to face down while the matte side faces up.
Finally, cut your design and weed out excess vinyl.
Apply your Design
Start by preheating your HTVRONT 10”x10” heat press to the right temperature, 315°F (157°C). Or according to your HTV manufacturer's instructions.
Place your tote bag on a flat heat-resistant surface, and pre-heat it for 5 seconds. Removing moisture and wrinkles.
Position your design on the tote bag, shiny side up.
It's time to press crafter! 10-15 seconds with medium to firm pressure.
You can also repeat the same process and press your design on the inner lining.
Finally, peel the transfer sheet according to the instructions (hot or cool).
Voila, your masterpiece is complete!
The creme-de-la-creme, you should be proud of yourself. You're a DIY tote bag-god now, so to speak.
As you can see, instead of throwing away your old worn-out apron, we've upcycled it into a stylish custom tote bag. Where we only needed an old cloth, hand-stitching machine, a cute design and a very dependable HTVRONT Heat Press 10”x10”.
We can all agree this was an absolute success! Right!?
So, guess what wine lovers, it's your turn for a little surprise. Join me next time for a step-by-step guide on how to turn a plain canvas to your very own custom wine bag.
To improve our service quality, we value your shopping experience at HTVRONT official website and your
willingness to recommend us to others. Please take a few moments to complete this survey.Your opinions are
important
to us. Thank you for your participation and support!
Would you recommend HTVRONT to others?(1-10)
Very UnwillingVery Willing
Please rate the HTVRONT services. (1: very dissatisfied, 10: very satisfied)