 Grab a Special Deal!
Recommended products

SECURED PAYMENT

FREE SHIPPING ON ORDERS $39+
3-15 Days Delivery

MONEY-BACK GUARANTEE
Your satisfaction is our priority

 Grab a Special Deal!


3-15 Days Delivery

Your satisfaction is our priority
 Grab a Special Deal!

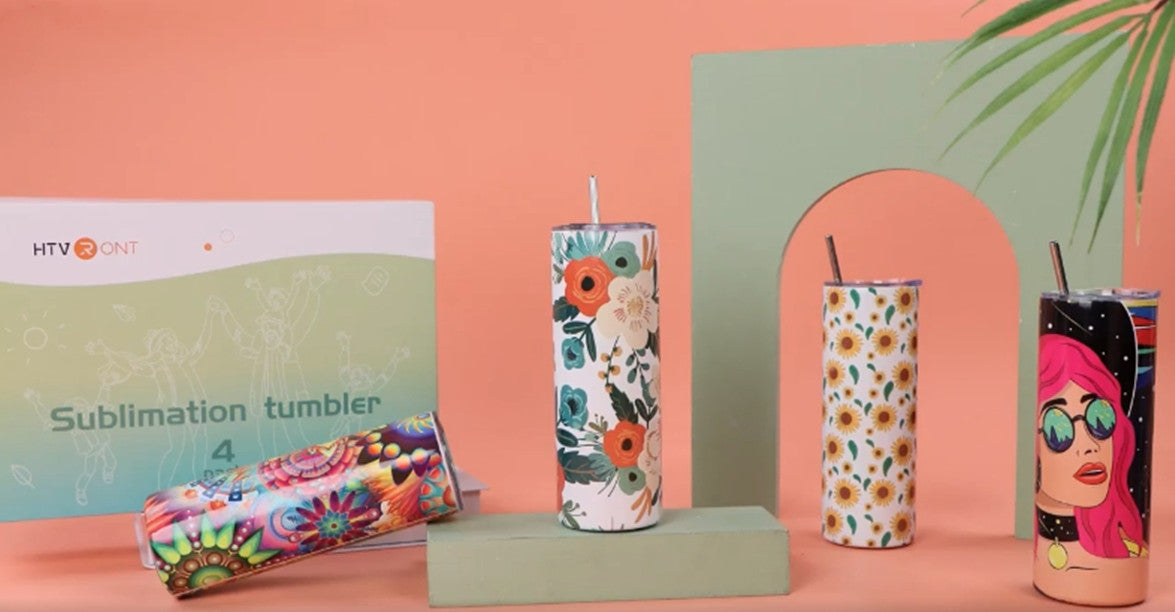
Sublimation is the process of transferring images or designs onto a substrate using heat and pressure. It’s a popular technique used in the world of crafting to create personalized items such as t-shirts, mugs, and tumblers.
And nowadays, sublimation tumblers have become increasingly popular and prevalent among household articles, individual youngster items, and lovely gifts for lovers and friends. This is all because of their long-lasting characteristic and the fact that they are always ready to be customized with virtually any design.
So, in this article, we’ll explore things about sublimation tumblers, like what it is, how to make sublimation tumblers, and the best sublimation paper for tumblers.
A sublimation tumbler is a kind of tumbler covered with a sublimation coating. Since sublimation itself is a high-tech method to transfer designs, it always requires a special outside layer to embed the sublimation ink. And that will help to develop a shiny, vibrant, colorful, and durable decoration on the tumbler. And sublimation tumbler is firm and top-quality, which allows it to resist the high temperature and pressure in the sublimating process.
Typically, a sublimation tumbler should work with a mug heat press or a sublimation tumbler heat press (a longer one). This type of heat press is unlike a regular heat press with a flat heat plate. Because of the curved surface of the tumbler, the tumbler press must be equipped with a curved heat plate for a larger and even heating area.
But it doesn’t matter if you don’t have one. A household oven can also work well and yield pretty projects. Their working principle is the same, enough heat.

After knowing these, making sublimated tumblers can be much more straightforward.
To craft your personalized sublimation tumblers, you’ll need a few basic materials. These include:
1. A sublimation printer or an inkjet printer
2. Sublimation paper
3. Sublimation ink
4. A tumbler or a mug press, or just an oven
5. A tumbler
6. Butcher paper
7. Heat-resistant tape
8. A pair of heat-resistant gloves
Once you get all the necessary materials, you can set the commencement of making your sublimation tumbler!
Check this video and follow our step-wise guide for you!
The first step in making a sublimation tumbler is designing the image or artwork you want to transfer onto the tumbler. You can create your design using any design software, such as Cricut Design Space, LoklikIdeaStudio, Silhouette Studio, or Illustrator. It can even be a memorable picture of your family members or friends. Make sure that your design is the correct size for the tumbler you’re using.
Next, set the sublimation ink into the printer, and then print your design onto sublimation paper for tumblers. Be careful that the final image needs to be face down on the tumbler. You must make sure that you print your design in reverse or mirror image mode so that it will transfer onto the tumbler correctly.
Before you transfer the design onto the sublimation tumbler, you’ll need to prepare it. Start by rubbing the tumbler with a lint-free cloth to remove any dust or debris.

Once your tumbler is clean, you are now ready to transfer the design onto it. Place the sublimation paper for tumblers with your design face down onto the tumbler. Use heat-resistant tape to secure the sublimation paper to the tumbler. 
Next, insert the sublimation tumbler into the sublimation press for tumblers or mug presses. Follow the manufacturer’s instructions for the correct sublimation tumbler heat press settings. The heat press should be set at around 300°F and preheat. When the machine reaches the set temperature, apply it to press the sublimation tumbler for about 4-6 minutes.

Once the tumbler sublimation is complete, remove the tumbler from the press and let it cool down. Remember to wear your heat-resistant gloves and not get hurt while taking the sublimated tumbler out.
Then, carefully remove the sublimation paper from the tumbler. Your design should now be transferred onto the tumbler, and this sublimated tumbler can be comfortable to touch.

Finally, inspect the tumbler to make sure that the design has transferred correctly. If there are any areas that didn’t transfer properly, you can repeat the process again to fix them. 
As for the best sublimation bundle for tumblers, what I use here is HTVRONT Sublimation Paper A4 - 8.5" x 11 Inch 150 Sheets. This sublimation paper for tumblers features a 98% high transfer rate, and it drys really fast. Also, the price is reasonable. I got 150 sheets in a bundle, which can totally settle my demands.
Check here you're looking for more a detailed guide on how to choose the best sublimtaion paper.
Actually, there are ways to remove the ink from such a firm object. From my experience, white vinegar is the most useful one. Put your sublimated tumblers in a basin and pour the white vinegar over it. Soak the tumblers in the vinegar for around one and a half hours. During this process, you can pick a cloth and rub the surface. Repeat that process until the deigns finally get off.
Yes, that’s an absolute answer! As I said before, the working principle is about the heat. The only difference between the oven and the sublimation press for tumblers is that you have to stand by the side and rotate the tumbler during the operation so that to ensure that both sides can get transferred evenly.
Yes. As long as the requirements of sublimation on tumblers are satisfied, you are free to work on your ideal designs and decorations!
In conclusion, making sublimation tumblers is a fun and creative way to personalize your drinkware. With the right materials and the right techniques, you can create a beautiful and long-lasting tumbler that’s unique to you. By following the steps outlined in this article, you’ll be able to make your own sublimation tumblers in no time. So, what are you waiting for? Start designing your tumbler today!
![[Ultimate Premium Bundle] Auto Heat Press Machine 15" x 15" 110V + 20 rolls HTV Bundle 12“x3ft + Mini Heat Press Machine + Sublimation & Tools Bundle](http://www.htvront.com/cdn/shop/files/205_2_385x.jpg?v=1733987310)


Reselect your machine
Reselect your machine
Reselect your machine
Reselect your machine
Reselect your machine

To improve our service quality, we value your shopping experience at HTVRONT official website and your willingness to recommend us to others. Please take a few moments to complete this survey.Your opinions are important to us. Thank you for your participation and support!
Website interaction (e.g., shopping page, promotion, order, payment process)
Product (e.g., product quality, style)
Logistics (e.g., shipping, delivery)
Customer Service (e.g., response speed, professionalism)
[Website - Shopping Page]
[Website - Promotion]
[Website - Order and Payment Process]
[Product]
[Logistics]
[Customer Service]