Recommended products

SECURED PAYMENT

FREE SHIPPING ON ORDERS $39+
3-15 Days Delivery

MONEY-BACK GUARANTEE
Your satisfaction is our priority


3-15 Days Delivery

Your satisfaction is our priority

Hey you all! Last week we talked about adhesive vinyl. We are gonna learn how to apply glitter vinyl this week. You will know What is glitter vinyl, how to use glitter iron on vinyl and so on.
To learn what is glitter vinyl, you have to learn what is vinyl. Vinyl is a kind of material that used to decorate apparel, bags, and other soft goods. It is divided into 2 kinds: one is adhesive vinyl and the other is heat transfer vinyl ( HTV for short).
Glitter vinyl is exactly what it sounds like...glittery, sparkly vinyl. You use it mostly the same way you would use other standard vinyl. But rather than the matte or glossy finish you get with traditional vinyl,glitter vinyl gives a pretty, sparkly sheen to your designs. Like standard vinyl, it comes in an array of colors and can be cut with your Cricut Explore (or any e-cutter) to make any design you can dream up!
If you are a fan of eye-catching projects, glitter vinyl is definitely your first choice!
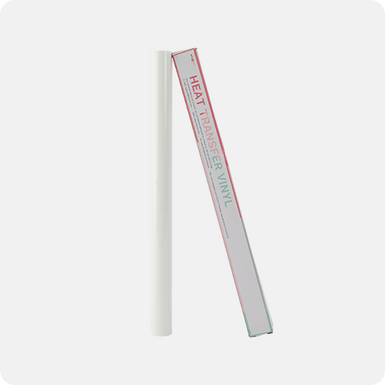
Like standard vinyl, glitter vinyl is also divided into htv (short for heat transfer vinyl and adhesive vinyl). Here we are talking mainly about heat transfer vinyl!

How to use glitter iron on vinyl ? The sparkling texture of sparkling vinyl will surely bring a wonderful and unique effect to your project. But using it can also be frustrating and tricky. From difficult to see lines of weeds to pasting images on transfer paper, here are some tutorials to apply glitter htv, as well as some ways to try to achieve the same excellent results as before.
Supplies: A cutting machine, glitter htv, an iron ( or a heat press), the object you are putting your vinyl design on.
Once you have all of your supplies on your table, it’s time to get cracking! I will skip all the basic steps, such as how to load a design in Cricut Explore or load and cut vinyl. If you are confused with that, go read my other tutorial!
The very first step is to load your vinyl onto your cutting mat. In my last project, I precisely cut the required size mold and installed it in the correct position on the cutting mat... The numbered grid makes this possible. However, for vinyl, you never know exactly how much you need (if you use the space-saving feature, it clamps all the icons and letters on the vinyl as tightly as possible), so I found a handy tip ... Don't cut into perfect parts and place them precisely in the right spot. Simply place the vinyl on the cutting mat and place the paper roll on the edge of the surface. Then, once it is done, you can cut off the excess vinyl and roll up the rest of the vinyl roll next time!
It's time to cut! Make sure your machine is set on vinyl and watch the magic happen.
Don’t bother yourself to stand up! We are not gonna head out to the garden! Weeding refers to removing excess vinyl from the your cutting design, leaving only the final design. Basically, you want to peel up all those extra small pieces and bobs in the final design... you should be able to do this easily by stripping off the excess vinyl.
If you buy our more than 20 sheets vinyl bundle, then you can get a tiny awesome weeding tool to help weed. When you are done you should have just your final design remaining on the mat.
Now it’s time for the magic to happen! Set the correct temperature according to the instruction that comes with your glitter vinyl or read the description of the product. There should be an instruction somewhere. Put your design on your fabrics. Then put your iron or heat press on it. Put for like 15 seconds. Wait it to turn cold. Now your design will peel up nicely from your transfer tape. Be careful with your design when you remove the top transfer tape.
Then you have your excellent unique works now!
That’s all about our glitter vinyl! Christmas is around the corner! If you are new to crafts, don’t put yourself in at deep end! Read our blogs carefully and learn from the start! That will help a lot!
What’s more, our galaxy printed htv is available now!!!!! Very excellent without shipping fees!GO GO GO!!!!
![[Ultimate Premium Bundle] Auto Heat Press Machine 15" x 15" 110V + 20 rolls HTV Bundle 12“x3ft + Mini 2 Heat Press Machine + Sublimation & Tools Bundle](http://www.htvront.com/cdn/shop/files/205_2_385x.jpg?v=1733987310)
![[Limited time deal]HTVRONT Auto Heat Press Machine for T Shirts 15x15 110V - (2 Colors) & Giveaway,Smart T Shirt Press Machine with Auto Release - Professional Heat Press for Sublimation, Vinyl, Heat Transfer Projects](http://www.htvront.com/cdn/shop/files/14_48773b2b-acb1-4eac-beda-65c369acbd5e_385x.jpg?v=1736306859)


Reselect your machine
Reselect your machine
Reselect your machine
Reselect your machine
Reselect your machine

To improve our service quality, we value your shopping experience at HTVRONT official website and your willingness to recommend us to others. Please take a few moments to complete this survey.Your opinions are important to us. Thank you for your participation and support!
Website interaction (e.g., shopping page, promotion, order, payment process)
Product (e.g., product quality, style)
Logistics (e.g., shipping, delivery)
Customer Service (e.g., response speed, professionalism)
[Website - Shopping Page]
[Website - Promotion]
[Website - Order and Payment Process]
[Product]
[Logistics]
[Customer Service]